GrungeMag Blogger Template


DemoDownload
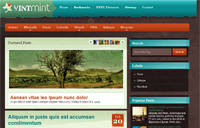
Template name : GrungeMag

Template features : Wordpress Look, 3 Columns, Right Sidebar, Magazine, Elegant Background, Featured Content Slider, Fixed Width, Tabbed Widget, Top Navigation Menu.

Release date : May 2012

Author :  www.soratemplates.com

Designer :  www.elegantthemes.com

Basic Instructions : How to install a Blogger Template

Configure Featured Content Slider:
Login to blogger dashboard --> layout --> Edit HTML. Now scroll down to where you see the codes below:
  • <div class='slide-items'>
    <a href='#'><img class='no_border' height='123' src='/image.jpg' width='155'/></a>
    <span class='slide-items-a'>
    <a href='#' rel='bookmark'>Ut sagittis ...</a>
    </span>
    </div>
    ..........
Now replace:
  • "#" with your featured post URL.
  • "image.jpg" with your slider image.

Configure Dropdown Menu:
Login to blogger dashboard --> layout --> Edit HTML. Now scroll down to where you see the codes below:
  • <ul class='nav superfish' id='nav2'>
    <li><a href='#'>Home</a></li>
    <li><a href='#'>About</a>
    <ul class='children'>
    <li><a href='#'>Contact Information</a></li>
    <li><a href='#'>Meet The Team</a></li>
    ..........
    <div id='categories'>
    <ul class='nav superfish'>
    <li><a href='#'>Custom Logos</a>
    <ul class='children'>
    <li><a href='#'>Case Studies</a></li>
    ..........
Just replace "#" with your menu item URL.

How To Change Tab Names of Tab Widget:
find this:
  • <ul class='tabs-widget tabs-widget-widget-themater_tabs-1432447472-id'>
    <li><a href='#widget-themater_tabs-1432447472-id1'>Tab 1</a></li>
    <li><a href='#widget-themater_tabs-1432447472-id2'>Tab 2</a></li>
    <li><a href='#widget-themater_tabs-1432447472-id3'>Tab 3</a></li>
    </ul>
Change the names "Tab 1", "Tab 2" and "Tab 3" as you like.

Influx Blogger Template


DemoDownload
Template name : Influx

Template features : Wordpress Look, 3 Columns, Right Sidebar, Personal, Fixed Width, Tabbed Widget, Top Navigation Menu.

Release date : May 2012

Author :  www.soratemplates.com

Designer :  www.elegantthemes.com

Basic Instructions : How to install a Blogger Template

How To Change Tab Names of Tab Widget:
find this:
  • <ul class='tabs-widget tabs-widget-widget-themater_tabs-1432447472-id'>
    <li><a href='#widget-themater_tabs-1432447472-id1'>Tab 1</a></li>
    <li><a href='#widget-themater_tabs-1432447472-id2'>Tab 2</a></li>
    <li><a href='#widget-themater_tabs-1432447472-id3'>Tab 3</a></li>
    </ul>
Change the names "Tab 1", "Tab 2" and "Tab 3" as you like.

eGallery Blogger Template


DemoDownload
Template name : eGallery

Template features : Wordpress Look, 4 Columns, Right Sidebar, Gallery, Elegant, Fixed Width, Top Navigation Menu.

Release date : May 2012

Author :  www.soratemplates.com

Designer :  www.elegantthemes.com

Basic Instructions : How to install a Blogger Template

How To Change Random Pics Widget:
search for:
  • <h2>Random Pics</h2>
    <li><a href='#'><img class='feature' height='53' src='/image.jpg' width='53'/></a>
    <em><img class='featured-hover-random' height='120' src='/thumb.jpg' width='207'/></em>
    </li>
    ..........
Now replace:
  • "#" with your banner URL.
  • "image.jpg" with your image URL.
  • "thumb.jpg" with your thumbnail URL.

Boardwalk Blogger Template


DemoDownload
Template name : Boardwalk

Template features : Wordpress Look, 2 Columns, Left Sidebar, Travel, Fixed Width, Blue Background, Vertical Navigation Menu.

Release date : May 2012

Author :  www.soratemplates.com

Designer :  www.wpnow.com

Basic Instructions : How to install a Blogger Template

Johny Blackstore, Blogger Template for your Online Store

I provide this template to your online store, easy to navigated all you have to do just read the instruction completly and you will see your online store work just as you seen in demo. I made this template with shopping cart features from wojodesign.com with Dollar in default currency, you can change with any Paypal currency such as Pounsterling, Euro etc.


Johny Blackstore template it was made especially for online store only. Design with magazine style blogger template with 4 column blogger template and one left sidebar, 3 column footer, shopping cart for blogger platform, automatic featured content slider, ads 728 x 90 px ready, pagination for blogger ready, dropdown menu, , zooming image, clean design template, and more. This template designed for online store only with daily updates. For more detail visit this link to see how to manage this template

Bloom Blogger Template


DemoDownload
Template name : Bloom

Template features : Wordpress Look, 3 Columns, Right Sidebar, Magazine, Elegant, Featured Content Slider, Fixed Width, Gray Background, Top Navigation Menu, Page Navigation.

Release date : May 2012

Author :  www.soratemplates.com

Designer :  www.wpnow.com

Basic Instructions : How to install a Blogger Template

Configure Featured Content Slider:
Login to blogger dashboard --> layout --> Edit HTML. Now scroll down to where you see the codes below:
  • <div id='mygallery'>
    <div class='imageElement'><h2>Was "Free Willy" Better Off in Captivity?</h2><p/>
    <a class='open' href='#' title='Read More'/>
    <img class='full' src='/image.jpg'/>
    <img class='thumbnail'/></div>
    ..........
Now replace:
  • "#" with your featured post URL.
  • "image.jpg" with your slider image.

Configure Dropdown Menu:
Login to blogger dashboard --> layout --> Edit HTML. Now scroll down to where you see the codes below:
  • <ul class='wpn_menu' id='menu'>
    <li><a href='#'>Home</a></li>
    <li><a href='#'>Get in Touch</a></li>
    ..........
    <ul class='wpn_submenu' id='submenu'>
    <li><a href='#'>Culture + Celebrity</a></li>
    <li><a href='#'>Fashion + Beauty</a></li>
    ..........
Just replace "#" with your menu item URL.

Configure Page Navigation Widget:
search for:
  • var posts=6, // Number of posts in each page
    num=2, // Number of buttons will display

Vintmint Blogger Template


DemoDownload
Template name : Vintmint

Template features : Wordpress Look, 2 Columns, Right Sidebar, Elegant, Featured Content Slider, Fixed Width, Brown Background, Top Navigation Menu, Page Navigation, Email Subscription Form.

Release date : May 2012

Author :  www.soratemplates.com

Designer :  www.wpnow.com

Basic Instructions : How to install a Blogger Template

Configure Post Date:
Log in to Blogger Dashboard --> Settings --> Format and change this:


If you don't do this, it will display "UNDEFINED".

Configure Featured Content Slider:
Login to blogger dashboard --> layout --> Edit HTML. Now scroll down to where you see the codes below:
  • <div class='featured'>
    <span class='wpn_heading'>Featured Posts</span>
    <div class='wpn_fthumbs'>
    <a class='wpn_featured-arrowl' href='#'/><span>
    <a href='#'><img class='wpn_active' src='/image.jpg'/></a>
    ..........
    <li><img class='wpn_thumbnail' src='thumb.jpg'/>
    <div class='wpn_finfo'><a class='wpn_title' href='#'>Donec gravida lacinia mi hendrerit hendrerit</a><br/>
    <p>Aenean at neque vel diam feugiat...<a href='#'>more</a></p></div>
    </li>
    ..........
Now replace:
  • "#" with your featured post URL.
  • "image.jpg" with your slider image.
  • "thumb.jpg" with your thumbnail image.

Configure Dropdown Menu:
Login to blogger dashboard --> layout --> Edit HTML. Now scroll down to where you see the codes below:
  • <ul class='submenu'>
    <li><a href='#'>Arnare</a></li>
    <li><a href='#'>Blesuada</a>
    <ul class='children'>
    <li><a href='#'>Cursus</a></li>
    <li><a href='#'>Fermentum</a></li>
    ..........
Just replace "#" with your menu item URL.

Elements Blogger Template


DemoDownload
Template name : Elements

Template features : Wordpress Look, Right Sidebar, 2 Columns, Elegant, Featured Content Slider, Fixed width, Dark, Tabbed widget, Top Navigation Menu.

Release date : May 2012

Author :  www.soratemplates.com

Designer :  www.wpnow.com

Basic Instructions : How to install a Blogger Template

Updated : (03-07-2012)
  • Sidebar widgets now can be hid/expanded.
  • jQuery Tabs added.

Configure Featured Content Slider:
Login to blogger dashboard --> layout --> Edit HTML. Now scroll down to where you see the codes below:
  • <div id='mygallery'>
    <div class='imageElement'>
    <h2>Little Big Planet spawns festive level pack</h2>
    <p>Phasellus ...</p>
    <a class='open' href='#' title='Read More'/>
    <img class='full' src='.../image.jpg'/>
    <img class='thumbnail'/>
    </div>
    ..........
Now replace:
  • "#" with your featured post URL.
  • "image.jpg" with your slider image

Configure the dropdown menu:
Login to blogger dashboard --> layout --> Edit HTML. Now scroll down to where you see the codes below:
  • <ul class='menu'>
    <li><a href='#'><span>Home</span></a></li>
    <li><a href='#'>HTML Elements!</a>
    ..........
    <ul class='submenu'>
    <li><a href='#'>Celebrities</a></li>
    <li><a href='#'>Miscellaneous</a></li>
    ..........
Now replace "#" with your menu item URL.

How To Change Tab Names of Tab Widget:
find this:
  • <ul class='tabs-widget tabs-widget-widget-themater_tabs-1432447472-id'>
    <li><a href='#widget-themater_tabs-1432447472-id1'>Popular</a></li>
    <li><a href='#widget-themater_tabs-1432447472-id2'>Latest News</a></li>
    <li><a href='#widget-themater_tabs-1432447472-id3'>Latest Comments</a></li>
    </ul>
Now change the names "Popular", "Latest News" and "Latest Comments" as you like.

2 Simple Templates Blogger for your site

Johny Simpleblog

This template has two basic colors, white and gray with a black background, easy loading and easy to navigated.

johny simpleblog


Johny Simpleblog was a simple template with classic style. There's no specific feature in this template. It's a white and grey color with 2 column blogger in there, easy loading and SEO friendly I think, 1 right sidebar, 3 columns footer, navigation drop down menu, ads ready, pagination for blogger ready, clean design template, and more. This template suitable for all type of content blog especially for daily blogs, but you can use it for your site anything you like to. I hope you enjoy it and happy blogging. For more detail visit this link, if you have any question about this template you can leave your message in that link.

Creating Website Template

creating website template


Ths template look like Maskolis used in his site. Free Creating Website blogger template is a blogger template with another style Creating Website template. It's a 3 column blogger template with 2 right sidebar, ads ready, there's no footer in this template, pagination for blogger ready, tabview ready, clean design template, and more. This template suitable for all type of blogs. You used it for any content for daily updates. For instruction how to use this template you can visit this link. Ask him how to navigated this template.

How to make an automatic Carousel slider based on labels?

In this tutorial I will discuss how to create automatic Carousel slider based on your labels in blogger. All you have to do only replace with your own label and the slider will work based on the label that you add in Edit HTML template. I made this carousel slider was very simple and only used jCarousellite script without adding easing effects or mousewheel.

carousel slider johny

  1. You must login to blogger with your account
  2. After that select the blog that you want to add slider.
  3. Go to the template >> Edit HTML and check the expand widget templates, don't forget to backup your template first.
  4. And then place this following codes above ]]></b:skin>:
    #carousel{width:950px;height:185px;margin-bottom:0px;position:relative;display:block}
    #carousel .container{position:absolute;left:49px;width:895px;height:185px;overflow:hidden;background:url(https://blogger.googleusercontent.com/img/b/R29vZ2xl/AVvXsEjcULH_HiehFy_tqrS_yRNeF2I_Vn6_Luc6dnZ0RLT3jIpPH_t6neGgtRWuIdLrnjoQJGMwj_lFGqcrTszHxh7KQDXIB7YxGMyXN-Sliutg-nt5_iP53QUL1vV1ARvtyudmXAS9Q0rlbOs/s1600/scroller-bg.png) repeat center}
    #carousel #previous_button{position:absolute;width:49px;height:185px;background:url(https://blogger.googleusercontent.com/img/b/R29vZ2xl/AVvXsEjwjcI0oBZkAyYAirSX2ivyhgxYAeSN5IcAD_q89qQ1aRWuQIR6QSligE4stIB2Q-8g8Ldkr2V3VVb4czT75yADzQT9fdGf7M2-J94I78vaMzls1mcpj_a-8nH1M-nQGuPoo3gZwUfqrtU/s1600/prev.png) center;z-index:100;cursor:pointer;border-right:1px solid #ccc}
    #carousel #previous_button:hover{background:url(https://blogger.googleusercontent.com/img/b/R29vZ2xl/AVvXsEjh4PB6OLLGQSZcIG8JfVRJ8Q0iAvbhpy0XIivWhWNX80emILw4vwWOqG8NGp-vAXkxE6f9tIMjCuw58PpCqhZ3G1Dmcg2PR5MWS5oLJ6Z4zpWJuQOpWuobqAXen5rGerzjOXBN2KT08Qw/s1600/prev.png) center}
    #carousel #next_button{position:absolute;right:0;width:49px;height:185px;background:url(https://blogger.googleusercontent.com/img/b/R29vZ2xl/AVvXsEgrg1nR-aj0oeb9rR46kd2RqfMKjJmhBj4SpBus7MfdBUocqUMU0lhRtBDAVhqhAwiygfgQ-GKM-CFtQqv-MNPr-VjXyoDLlc0MWWRrRML9wzn_PVcjquFSE5tEmQwhLDfwmaA_GZFLsg4/s1600/next.png) center;z-index:100;cursor:pointer;border-left:1px solid #ccc}
    #carousel #next_button:hover{background:url(https://blogger.googleusercontent.com/img/b/R29vZ2xl/AVvXsEhmfZpnu_OcCL_82zrtMHRf-RkbqYxNr6JRNkss4KfGilj_iMdJAzy0hU9w533XddVsTzHtITqtj-sTvCg1JHw0-T6A8PT6SoGOKwBPlKNiiRy1GpE7Oxw4nOlh7N2b-XC877zBtZFPp8A/s1600/next.png) center}
    #carousel ul{width:100000px;position:relative;margin-top:10px}
    #carousel ul li{background:#fff url(https://blogger.googleusercontent.com/img/b/R29vZ2xl/AVvXsEhlyT_vMYdUvjBT4OHYAzEU8MubzQLpWGm3q-3bylzii8PKhZW6Ar4I6-0iiQcTk0CA4Nr2fV3TIx0_orSs9K2BMrVUoXe1-P5bXaHs6jW1yhZgW3cHPuhCw0W6mfuxLYIqpPJa5Uq2dp0/s1600/main.png) repeat-x top;display:inline;float:left;text-align:center;font-weight:700;font-size:.9em;line-height:1.2em;border:1px solid #ccc;width:145px;height:150px;margin:0 4px 20px 7px;padding:6px;-webkit-border-radius:4px;-moz-border-radius:4px;border-radius:4px;}
    #carousel ul li:hover{filter:alpha(opacity=75);opacity:.75;}
    #carousel ul li a.slider_title{color:#222;display:block;margin-top:5px}
    #carousel ul li a.slider_title:hover{color:#cd1713}
    #carousel a img{display:block;background:#fff;margin-top:0}
    Look at some codes with the blue color above, that's the width and height of the slider in the demo that I made, change with your own size depend on your template width.
  5. Still in Edit HTML, add this following code above </head> :
    <script src='http://ajax.googleapis.com/ajax/libs/jquery/1.7.2/jquery.min.js' type='text/javascript'/>
    <script src='http://kauman.googlecode.com/files/jcarousellite.js' type='text/javascript'/>

    <script type='text/javascript'>
    //<![CDATA[
    imgr = new Array();
    imgr[0] = "https://blogger.googleusercontent.com/img/b/R29vZ2xl/AVvXsEgxgzxHOCWO91dpWC7pCqc1XDHq5pwfPAaUcheM_muMtG3Qs8btE-bxu_ioh1LfPsJXOnGVz4B2pmx-FbRDfmaqEs-gOED-zsbfHaX0z7YmwxvlCH3DAUVB34wMt9cM1R3wadFEEST6kes/s1600/no+image.jpg";
    showRandomImg = true;

    aBold = true;

    summaryPost = 140;
    summaryTitle = 25;

    numposts1 = 15;
    label1 = "news";

    function removeHtmlTag(strx,chop){
    var s = strx.split("<");
    for(var i=0;i<s.length;i++){
    if(s[i].indexOf(">")!=-1){
    s[i] = s[i].substring(s[i].indexOf(">")+1,s[i].length);
    }
    }

    s = s.join("");
    s = s.substring(0,chop-1);
    return s;
    }
    function showrecentposts(json) {
    j = (showRandomImg) ? Math.floor((imgr.length+1)*Math.random()) : 0;
    img = new Array();
    document.write('<ul>');
    for (var i = 0; i < numposts1; i++) {
    var entry = json.feed.entry[i];
    var posttitle = entry.title.$t;
    var pcm;
    var posturl;
    if (i == json.feed.entry.length) break;
    for (var k = 0; k < entry.link.length; k++) {
    if (entry.link[k].rel == 'alternate') {
    posturl = entry.link[k].href;
    break;
    }
    }

    for (var k = 0; k < entry.link.length; k++) {
    if (entry.link[k].rel == 'replies' && entry.link[k].type == 'text/html') {
    pcm = entry.link[k].title.split(" ")[0];
    break;
    }
    }

    if ("content" in entry) {
    var postcontent = entry.content.$t;}
    else
    if ("summary" in entry) {
    var postcontent = entry.summary.$t;}
    else var postcontent = "";
    postdate = entry.published.$t;
    if(j>imgr.length-1) j=0;
    img[i] = imgr[j];
    s = postcontent ; a = s.indexOf("<img"); b = s.indexOf("src=\"",a); c = s.indexOf("\"",b+5); d = s.substr(b+5,c-b-5);
    if((a!=-1)&&(b!=-1)&&(c!=-1)&&(d!="")) img[i] = d;
    //cmtext = (text != 'no') ? '<i><font color="'+acolor+'">('+pcm+' '+text+')</font></i>' : '';
    var month = [1,2,3,4,5,6,7,8,9,10,11,12];
    var month2 = ["Jan","Feb","Mar","Apr","May","Jun","Jul","Aug","Sep","Oct","Nov","Dec"];
    var day = postdate.split("-")[2].substring(0,2);
    var m = postdate.split("-")[1];
    var y = postdate.split("-")[0];
    for(var u2=0;u2<month.length;u2++){
    if(parseInt(m)==month[u2]) {
    m = month2[u2] ; break;
    }
    }

    var daystr = day+ ' ' + m + ' ' + y ;
    var trtd = '<li class="car"><div class="thumb"><a href="'+posturl+'"><img width="145" height="100" class="alignnone" src="'+img[i]+'"/></a></div><p><a class="slider_title" href="'+posturl+'">'+posttitle+'</a></p></li>';

    document.write(trtd);
    j++;
    }
    document.write('</ul>');
    }
    //]]>
    </script>
    Notes:
    See the red URL script above, that's the latest series jQuery.min.js script code that I use to made this slider. And if you've found jQuery.min.js although with the different series in your template, the red codes no longer need to insert. There must be only one jQuery.min.js in your template, it is up to the serial number, if possible the latest version.
    Blue code (15) : amount of your post that display in the slider. news was a label that I choose to show up in slider.
  6. Next step you must call the slider to appear in your blog. Place this following code above <div id='main-wrapper'>:
    <b:if cond='data:blog.pageType != &quot;item&quot;'>
    <div id='carousel'>
    <div id='previous_button'/>
    <div class='container'>
    <script>
    document.write(&quot;&lt;script src=\&quot;/feeds/posts/default/-/&quot;+label1+&quot;?max-results=&quot;+numposts1+&quot;&amp;orderby=published&amp;alt=json-in-script&amp;callback=showrecentposts\&quot;&gt;&lt;\/script&gt;&quot;);
    </script>   
    <div class='clear'/>
    </div>
    <div id='next_button'/>
    </div>
    <script type='text/javascript'>
    (function($) {     $(document).ready(function(){
    $(&quot;#carousel .container&quot;).jCarouselLite({
        auto:4000,
        scroll: 1,
        speed: 800,   
        visible: 5,
        start: 0,
        circular: true,
        btnPrev: &quot;#previous_button&quot;,
        btnNext: &quot;#next_button&quot;
        });
        })})(jQuery)   
    </script>
    </b:if>
    You can also put the following codes in the bottom of your navigation menu or you can also placed in your footer side, that's depend on your needs.
  7. The final step, save templates and see the results.

3 Style Johny Storage Template Blogger

These 3 template was only modified from my previous version in Amazing Magazine Template Blogger for your portal site. I modified those template with 3 colors choosen in dark, blue and red color; and add some additional widget in the middle of this template.

Johny Storage Dark


Johny Storage Blue


Johny Storage Red


For more detail about how to use this template plese visit this link, translate it n English with widget translation flag in the top of sidebar.

Kategori

Kategori